How to Use a VPN on Linux Step by Step

A VPN, or Virtual Private Network, is a tool that encrypts your internet traffic and routes it through a secure server, hiding your real IP address and protecting your data from trackers, advertisers, and snoops. If you want to use a VPN on Linux step by step, you have three main paths: OpenVPN, WireGuard, or a commercial VPN client like NordVPN CLI. Each method requires different tools, permissions, and configuration files. This guide walks you through all three, plus troubleshooting tips for when things go sideways. You will need sudo access and a basic comfort with the terminal.
What VPN types and tools are available for Linux users?
Linux supports three main VPN approaches, and choosing the right one depends on whether you want full control, modern performance, or simplicity.
OpenVPN is the long-standing standard. It uses SSL/TLS encryption and runs as a systemd daemon on Ubuntu and most Debian-based distros. It works in both client and server modes, making it ideal if you want to self-host your own VPN server. The tradeoff is complexity. You manage certificates, keys, and config files manually.

WireGuard is the modern alternative. It is built directly into the Linux kernel since version 5.6, which means it runs faster and with less overhead than OpenVPN. WireGuard configuration revolves around Linux-native interface files and firewalling policies rather than GUI interactions. That means no click-and-connect button. You edit config files and manage keys yourself.
Commercial VPN clients like NordVPN CLI sit at the other end of the spectrum. They handle authentication, protocol selection, and kill switch management through simple commands. They are the fastest path to a working VPN if you are not interested in self-hosting.
Here is a quick comparison to help you decide:
| Method | Best for | Complexity | Self-hosted |
|---|---|---|---|
| OpenVPN | Full control, server setup | High | Yes |
| WireGuard | Speed, modern Linux setups | Medium | Yes |
| NordVPN CLI | Easy consumer VPN use | Low | No |
Pro Tip: If you are new to Linux VPNs, start with a commercial client. You can always migrate to WireGuard or OpenVPN once you understand how VPN routing works on your system.
How to set up OpenVPN on Linux step by step
OpenVPN on Ubuntu requires two packages and a working PKI (Public Key Infrastructure) to handle certificates and keys. Here is the full process.
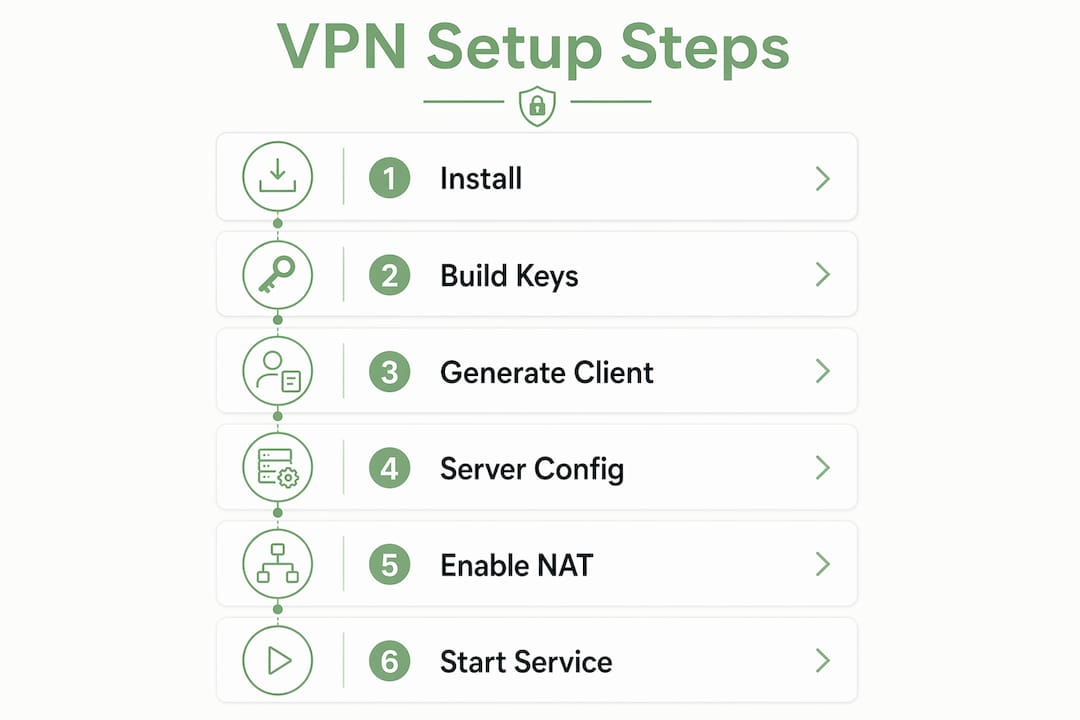
Step 1: Install the packages. Run "sudo apt install openvpn easy-rsa` to get both the VPN daemon and the certificate management tool. The openvpn and easy-rsa packages are available in Ubuntu’s default repositories and install cleanly on Ubuntu 22.04 and 24.04.
Step 2: Build your PKI.
Create a directory with make-cadir ~/openvpn-ca, then navigate into it and run ./easyrsa init-pki, ./easyrsa build-ca, and ./easyrsa gen-req server nopass. This generates your Certificate Authority, server certificate, and server key. You also need a Diffie-Hellman file: ./easyrsa gen-dh.
Step 3: Generate client credentials.
Run ./easyrsa gen-req client1 nopass followed by ./easyrsa sign-req client client1. Copy the resulting .crt, .key, and ca.crt files to your client machine.
Step 4: Write the server config.
Create /etc/openvpn/server.conf. At minimum, specify your port (1194 UDP is standard), the tun device, certificate paths, and push "redirect-gateway def1" to route all client traffic through the tunnel.
Step 5: Enable IP forwarding and set up NAT.
This step is where most beginners get stuck. OpenVPN alone does not handle packet forwarding. You must enable kernel forwarding and configure iptables masquerading, or connected clients will have no internet access. Run echo 1 > /proc/sys/net/ipv4/ip_forward and add the line net.ipv4.ip_forward=1 to /etc/sysctl.conf for persistence. Then add an iptables rule: sudo iptables -t nat -A POSTROUTING -s 10.8.0.0/24 -o eth0 -j MASQUERADE.
Step 6: Start the service.
Run sudo systemctl start openvpn@server and sudo systemctl enable openvpn@server. On the client side, place your .ovpn config file and run sudo systemctl start openvpn@client.
| Step | Command | Purpose |
|---|---|---|
| Install packages | sudo apt install openvpn easy-rsa |
Gets VPN daemon and cert tools |
| Enable forwarding | sysctl -w net.ipv4.ip_forward=1 |
Allows traffic routing |
| Start server | sudo systemctl start openvpn@server |
Activates VPN daemon |
Pro Tip: Run sudo journalctl -u openvpn@server -f while starting the service. It shows real-time errors so you catch certificate mismatches or port conflicts immediately.
How to install and configure WireGuard VPN on Linux
WireGuard is faster to set up than OpenVPN once you understand its key-pair model. Every peer, server or client, has a public and private key. The server’s config lists each client as a “peer,” and vice versa.
Step 1: Install WireGuard.
Run sudo apt install wireguard. WireGuard is available in default Ubuntu repos and installs in seconds.
Step 2: Generate key pairs.
On the server: wg genkey | tee /etc/wireguard/privatekey | wg pubkey > /etc/wireguard/publickey. Repeat this on the client machine. Keep private keys private. Never share them.
Step 3: Write the server config.
Create /etc/wireguard/wg0.conf with the following structure:
[Interface]
Address = 10.0.0.1/24
ListenPort = 51820
PrivateKey = <server_private_key>
PostUp = iptables -A FORWARD -i wg0 -j ACCEPT; iptables -t nat -A POSTROUTING -o eth0 -j MASQUERADE
PostDown = iptables -D FORWARD -i wg0 -j ACCEPT; iptables -t nat -D POSTROUTING -o eth0 -j MASQUERADE

[Peer]
PublicKey = <client_public_key>
AllowedIPs = 10.0.0.2/32
The PostUp and PostDown rules handle NAT automatically when the interface comes up or goes down.
Step 4: Enable IP forwarding.
Just like OpenVPN, IP forwarding must be enabled for clients to reach the internet. Add net.ipv4.ip_forward=1 to /etc/sysctl.conf and run sudo sysctl -p.
Step 5: Start and enable the service.
Run sudo systemctl enable --now wg-quick@wg0. The wg-quick wrapper handles interface creation and firewall rules automatically.
Step 6: Connect the client.
On the client, create a matching wg0.conf with the server’s public key listed under [Peer] and AllowedIPs = 0.0.0.0/0 to route all traffic. Run sudo wg-quick up wg0 and verify with sudo wg show.
- Check active peers and handshake times with
sudo wg show - Verify your public IP changed with
curl ifconfig.me - Check routing table with
ip route show
Pro Tip: Use wg-quick instead of raw wg commands. It handles interface setup, routing, and firewall rules in one step, saving you from manual iptables management.
How to use a commercial VPN client on Linux
Commercial VPN clients remove most of the manual configuration. NordVPN’s CLI is a solid example of how this works on Ubuntu and other Debian-based systems.
Step 1: Install the client.
Download and run the official install script: sh <(curl -sSf https://downloads.nordcdn.com/apps/linux/install.sh). This adds the NordVPN repository and installs the CLI. Add your user to the nordvpn group: sudo usermod -aG nordvpn $USER, then log out and back in.
Step 2: Authenticate.
Run nordvpn login. On a headless server, this returns a URL. Open it in a browser, log in, and copy the callback URL back to the terminal with nordvpn login --callback <url>.
Step 3: Choose your protocol.
NordVPN supports NordLynx (which runs on WireGuard) and OpenVPN. Set it with nordvpn set technology nordlynx for the faster WireGuard-based option.
Step 4: Configure the kill switch carefully.
The kill switch blocks all traffic if the VPN drops, which is great for privacy but dangerous on a remote server. Before enabling it, allowlist your SSH port: nordvpn whitelist add port 22. Then enable it: nordvpn set killswitch on.
Step 5: Connect and manage.
Run nordvpn connect to connect to the fastest server. Use nordvpn connect United_States to pick a country. Set auto-connect with nordvpn set autoconnect on. Disconnect with nordvpn disconnect.
Pro Tip: VPN kill switches require nuanced setup on Linux. Always allowlist your management ports before enabling the kill switch. Skipping this step on a remote server means you lose SSH access the moment the VPN drops.
Linux VPN troubleshooting tips that actually work
Most VPN problems on Linux fall into four categories: no internet after connecting, VPN disconnects immediately, kill switch lockout, and interface conflicts.
No internet after connecting is the most common issue with self-hosted setups. OpenVPN clients can connect but have no internet access if routing or NAT is not correctly configured on the server. Check that net.ipv4.ip_forward equals 1 with cat /proc/sys/net/ipv4/ip_forward and verify your iptables MASQUERADE rule is active with sudo iptables -t nat -L.
Immediate VPN disconnects often trace back to network automation tools. Proxy configurations applied to VPN virtual interfaces like tun0 or cscotun0 can break the tunnel instantly. If you use tools like Ansible, Puppet, or corporate endpoint management software, check whether they are applying HTTP proxy settings to your VPN interface. Exclude VPN interfaces from those policies.
Kill switch lockout happens when you enable a kill switch on a remote server without allowlisting SSH first. If you are already locked out, you need console access through your hosting provider to disable the kill switch.
- Run
sudo journalctl -u openvpn@server -xeto read full service logs - Use
ip addr show tun0orip addr show wg0to confirm the interface is up - Run
ping 10.8.0.1from the client to test tunnel connectivity before testing internet access - Check DNS with
nslookup google.comto rule out DNS leaks
Remember: VPN virtual interfaces like
tun0andwg0must be treated as special by any network management or automation tools on your system. Applying standard proxy or firewall policies to them causes conflicts and disconnects.
Pro Tip: Always test your VPN connection in this order: tunnel up, ping the server’s VPN IP, ping an external IP like 8.8.8.8, then test DNS. This sequence isolates exactly where the problem is.
Key takeaways
Setting up a VPN on Linux requires choosing the right method, configuring IP forwarding and firewall rules correctly, and testing each layer of connectivity before assuming the tunnel works.
| Point | Details |
|---|---|
| Choose your method first | OpenVPN suits self-hosting, WireGuard offers speed, commercial clients offer simplicity. |
| IP forwarding is mandatory | Without net.ipv4.ip_forward=1 and NAT rules, clients connect but cannot reach the internet. |
| Kill switch needs prep | Allowlist SSH port before enabling kill switch to avoid remote server lockout. |
| Test in layers | Verify tunnel, then ping, then DNS. Skipping steps hides the real failure point. |
| Proxy conflicts break tunnels | Exclude VPN interfaces from proxy and automation policies to prevent disconnects. |
Why I think most Linux VPN guides skip the part that matters most
By Darius Helzinski
Most Linux VPN tutorials stop at “the service is running.” That is not the same as “the VPN is working.” The gap between those two states is where most people get stuck, and it is almost always a routing or firewall issue, not a VPN issue.
My honest recommendation: if you are managing a remote server, use a commercial client like NordVPN CLI for your first VPN setup. Not because it is better technically, but because it handles the firewall rules for you. Once you understand what a working VPN looks like from the inside, self-hosting with WireGuard becomes much less intimidating.
WireGuard is genuinely excellent for Linux. It is fast, the config files are readable, and the kernel integration means fewer moving parts. But you still need to understand Linux networking basics, specifically routing tables and iptables, to make it reliable. Skipping that knowledge and just copying config files is how you end up with a tunnel that looks active but leaks your real IP.
The kill switch issue deserves more attention than it gets. I have seen experienced sysadmins lock themselves out of production servers because they enabled a kill switch without allowlisting SSH. It takes 10 seconds to add that exception. It takes hours to recover from not doing it. Learn more about managing VPN connections before you touch kill switch settings on any remote machine.
— Darius Helzinski
Try Rapidrabbit: Linux VPN that just works
If all of this feels like a lot of work just to stay private online, that is because self-hosting a VPN genuinely is a lot of work. Rapidrabbit takes a different approach.

Rapidrabbit runs on WireGuard, the same protocol that powers the fastest and most secure VPN setups on Linux today. You get strong encryption, fast speeds, and a setup that does not require you to manage certificates, firewall rules, or PKI infrastructure. It works on Linux, Windows, and Android, with iOS coming soon. Whether you are on public Wi-Fi at a café or browsing from home, Rapidrabbit keeps your traffic private. See how it works and hop around the web safely.
Want to understand more about why a VPN matters before you commit? Explore the full picture and see what Rapidrabbit can do for your privacy.
FAQ
What is the easiest way to set up a VPN on Linux?
Installing a commercial VPN client like NordVPN CLI is the fastest path. It handles protocol selection, firewall rules, and authentication automatically, requiring only a few terminal commands.
Does WireGuard work on all Linux distros?
WireGuard is built into the Linux kernel since version 5.6 and is available via apt on Ubuntu 20.04 and later. Most modern distros support it natively without additional kernel modules.
Why do I have no internet after connecting to my VPN on Linux?
IP forwarding and NAT rules are almost always the cause. Confirm net.ipv4.ip_forward=1 is set and that an iptables MASQUERADE rule is active on your server’s outbound interface.
Can a VPN kill switch lock me out of my server?
Yes. Kill switches block all traffic when the VPN drops, including SSH. Always allowlist port 22 before enabling a kill switch on any remote Linux machine.
What causes a VPN to disconnect immediately on Ubuntu?
Proxy configurations applied to VPN interfaces like tun0 by network automation tools are a common cause. Exclude VPN interfaces from any proxy or endpoint management policies on your system.